

Make endless gluten-free pies all year with this easy shortcrust pastry recipe. Perfect for sweet or savory pies, served fresh out of the oven for a crowd-pleasing treat.

A fantastic gluten-free pie crust is a must for a tasty gluten-free pie crust. Let's face it: a great pie can go south with a bad crust. This gluten-free shortcrust pastry recipe ensures the perfect gluten-free crust for all your baking needs. In my house, my husband consistently requests a gluten-free pumpkin pie, and this recipe never disappoints.
You might also like my gluten-free graham cracker crust recipe.
Jump to:
- What is Shortcrust Pastry?
- Why You'll Love This Shortcrust Pastry Recipe?
- Ingredients You'll Need
- How to make a gluten-free pie crust?
- What is Blind Baking?
- How to Blind Bake Shortcrust Pastry?
- Tips For Flaky Shortcrust Pastry
- Does Gluten-free Pie Crust take Longer to Bake?
- How Many Pies?
- How to Store Shortcrust Pastry?
- Can I freeze this Gluten-Free Shortcrust Pastry?
- Ways to Use Gluten-free Shortcrust Pastry
- More Gluten-free Desserts to try
- 📖 Recipe
What is Shortcrust Pastry?
Shortcrust pastry is a type of pastry that is commonly used for making pies, tarts, and quiches. It combines flour, butter, and water to create a crumbly texture that holds together when baked. This type of pastry is known for its versatility and ability to complement sweet and savory fillings. Shortcrust pastry is the perfect base for your recipes, whether making a fruit-filled pie or a delicious quiche.
Why You'll Love This Shortcrust Pastry Recipe?
- It is foolproof and easy.
- Versatile for any filling.
- It has a tender and flaky crust that enhances the overall indulgence of the pies.
Ingredients You'll Need
This gluten-free shortcrust pastry needs only a few ingredients to make the perfect gluten-free pie crust for whatever pie you are baking.
- 1:1 Gluten-free Flour: I use King Arthur 1:1.
- Butter: I recommend using unsalted butter for a rich and buttery flavor.
- Shortening: It adds moisture and tenderness to the crust.
- Salt: Add a pinch of salt to enhance the crust's flavor.
- Sugar: Omit the sugar if you want to make this a more savory crust for making things like a gluten-free quiche.
- Apple Cider Vinegar: Helps to tenderize the dough and create a flaky texture.
- Egg Yolk: Adds richness and helps bind the ingredients together.
- Cold Water: Gradually add cold water, one tablespoon at a time, until the dough comes together and forms a ball. Be careful not to overwork the dough.

How to make a gluten-free pie crust?
- Cut and chill your butter and shortening.
- Combine the gluten-free flour, salt, and sugar.
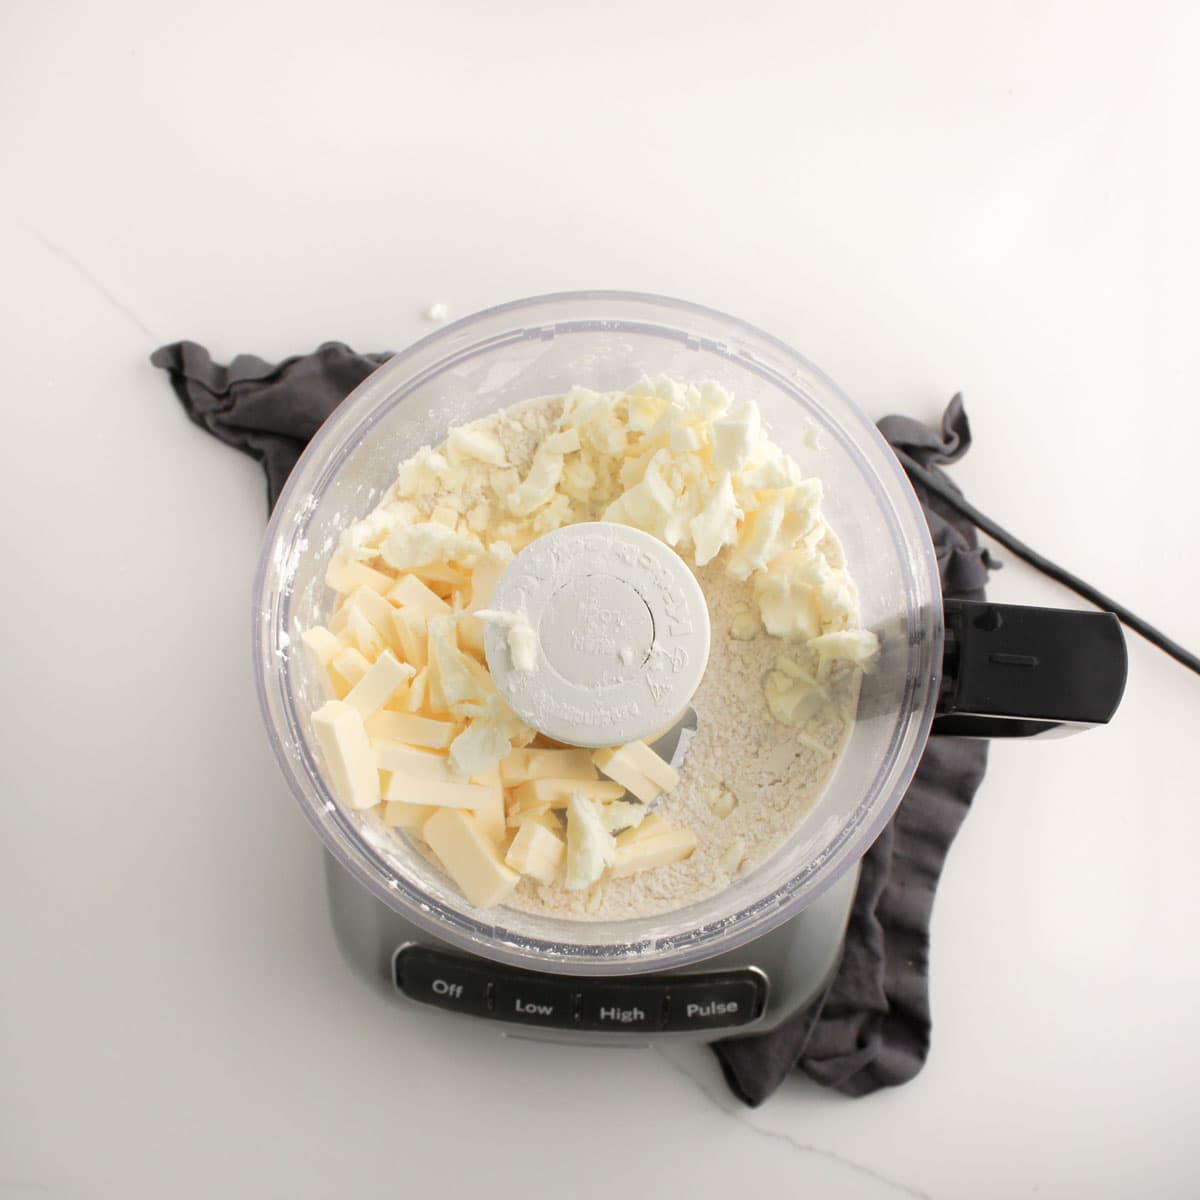
- Break up the cold butter and shortening into the dry ingredients for a flaky texture.

- Add the apple cider vinegar to the mixture.
- Slowly add the cold water to the dough until it sticks together when it is pinched.
- Transfer the dough to a lightly floured surface and shape it into a ball.
- Wrap the dough tightly and let it rest at room temperature for 30 minutes before rolling out your gluten-free crust.


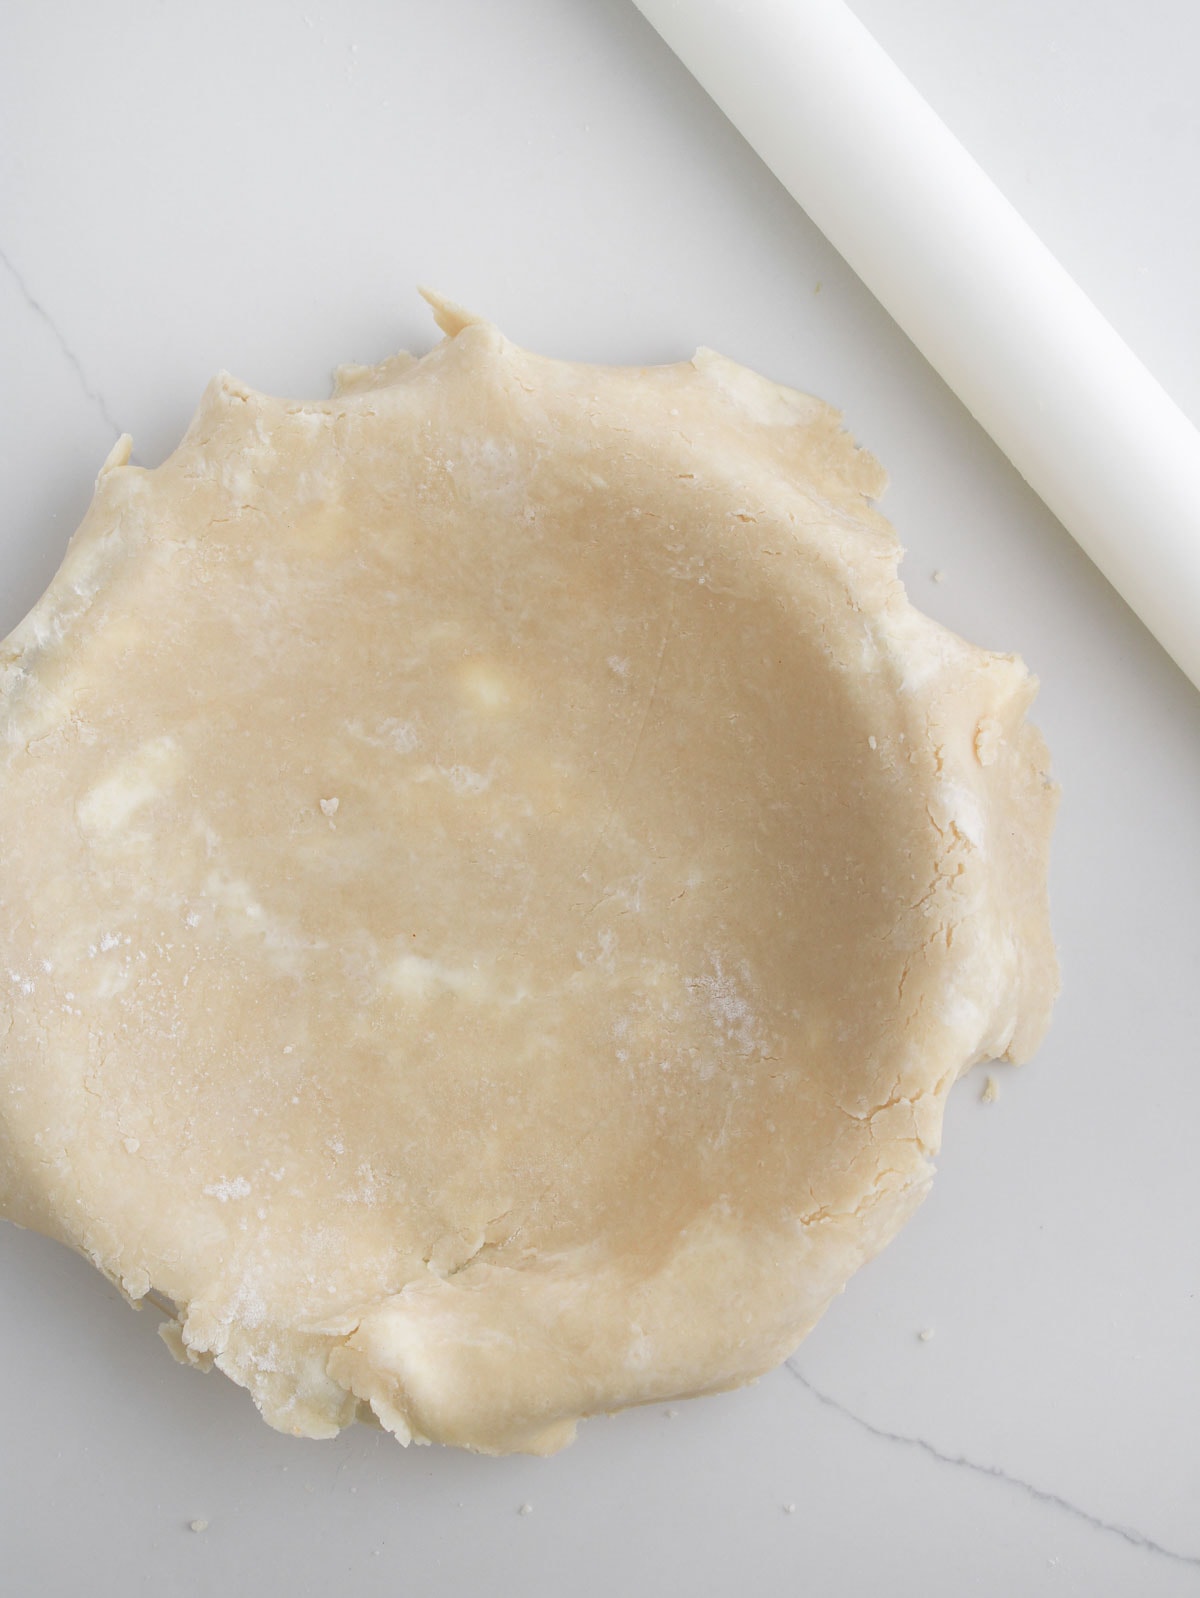
- Roll out the gluten-free crust to the desired size and use it like any other pie crust.

What is Blind Baking?
It is a technique used in baking where the crust is partially or fully baked before adding the filling. This helps to prevent a soggy bottom crust, especially when making pies with juicy fillings.
How to Blind Bake Shortcrust Pastry?
- I recommend par baking this gluten-free pie dough for the best results. Heat your oven to 375 degrees.
- Cover the crust with parchment paper and fill it with pie weights, dry rice, dry beans, or raw sugar.
- Bake the pie crust for 15 minutes until the bottom is raw.
- Bake the crust for 5-8 minutes after removing the filling and parchment paper.
- Fill your pie as desired and finish baking to your recipe specifications.

Tips For Flaky Shortcrust Pastry
- Using cold ingredients is essential for achieving a flaky shortcrust pastry. This includes using cold butter or shortening. The cold ingredients create pockets of fat in the dough, which melt during baking and create a flaky texture.
- Do NOT chill the dough if you plan on using it the same day. The gluten-free crust can get stiff once chilled, making it harder to roll out without cracking.
- If you are NOT planning on rolling out and shaping this gluten-free shortcrust on the same day, you can chill it in the fridge. Let it sit at room temperature for at least an hour before rolling it out.
- Brush the dough with an egg wash before baking it for a beautiful golden crust.
- Add some turbinado sugar to the egg wash for sweetness and crunch.
- Use a glass baking dish. Seeing the bottom of the pie crust helps ensure you can see that the bottom of your gluten-free pie is nice and golden before removing it from the oven.
- If you're baking a gluten-free pie with a wet base (for example, pumpkin pie or a gluten-free quiche), always blind-bake your pie crust. For added protection against a soggy bottom pie, brush the top of the pie crust with an egg wash or egg white and then pop it back into the oven for 2-3 minutes to set. This will help create a seal between the crust and the filling.
- If the tops or edges of your crust get golden and the pie is not done, tent the crust with some foil and continue to bake.
Does Gluten-free Pie Crust take Longer to Bake?
Gluten-free pie crust can sometimes take longer to bake than traditional pie crust. I also find that par-baking a gluten-free pie crust base, even if I am going to cover the top, yields a better final result because the liquids in the pie do not absorb as much into the gluten-free crust cooked as it does raw. Always check your crust to make sure it is fully cooked before removing it from the oven.
How Many Pies?
This gluten-free shortcrust pastry recipe yields enough for one 8-10-inch pie crust. To make a double-layer gluten-free pie, you must make a double batch.
How to Store Shortcrust Pastry?
This gluten-free pie dough can be wrapped and stored in the fridge for up to two days before use. If you want to store it longer, you can freeze this gluten-free crust recipe for up to three months. Just let the dough sit at room temperature so it is easier to roll out when you are ready to use it.
Can I freeze this Gluten-Free Shortcrust Pastry?
Yes, you can freeze Gluten-Free Shortcrust Pastry. Wrap it tightly in plastic wrap or an airtight container before freezing. When ready to use it, thaw it in the refrigerator overnight before rolling it out and baking it as desired.
Ways to Use Gluten-free Shortcrust Pastry
This gluten-free pie crust recipe can be used in any pie or tart recipe you want to make gluten-free, such as my gluten-free pumpkin pie. You can even use it as a galette crust.
Leave out the sugar and use it as a savory crust for a quick and easy quiche, or make my delicious gluten-free chicken pot pie recipe.
More Gluten-free Desserts to try


📖 Recipe

Gluten-free Shortcrust Pastry Pie Crust
Ingredients
- 2 Cups 1:1 Gluten-free Flour 248 grams. I use King Arthur Brand 1:1
- ½ Cup Cold Butter Cubed
- ¼ Cup Cold Shortening
- 1 Tablespoon Sugar Omit for a savory crust
- 1 Teaspoon Salt
- 1 Teaspoon Apple Cider Vinegar
- 1 Egg Yolk
- ⅓-½ Cup Cold Water
Instructions
Making gluten-free shortcrust pastry
- Cut your cold butter into cubes and place it along with your shortening in the freezer while you prep the remaining ingredients.½ Cup Cold Butter, ¼ Cup Cold Shortening
- In a bowl or the bowl of a food processor, combine the gluten-free flour, salt, and sugar.2 Cups 1:1 Gluten-free Flour, 1 Tablespoon Sugar, 1 Teaspoon Salt
- Break up the cold butter and shortening into the flour mixture. You do NOT want to make this look like wet sand. It should be shaggy with pieces of butter and shortening still visible.
- Add the apple cider vinegar and egg yolk to the flour mixture.1 Teaspoon Apple Cider Vinegar, 1 Egg Yolk
- Slowly add the cold water a little bit at a time. Stop adding water when your dough starts to stick together when you pinch some of it together.⅓-½ Cup Cold Water
- Transfer the dough to a lightly floured surface and shape it into a ball.
- Tightly wrap the gluten-free dough and let it rest at room temperature for about 30 minutes before rolling it out.
- Roll out the gluten-free crust to the desired size and use it like any other pie crust.
Par-baking/ blind bake your gluten-free pie crust
- I highly recommend par baking this gluten-free pie crust no matter how you plan on using it for the best results. To do so, preheat your oven to 375 degrees.
- Cover your crust with parchment paper and fill the pie with pie weights, dry rice, dry beans, or even raw sugar to fill the pie crust.
- Bake the pie crust for 15 minutes or until the bottom of the pie crust no longer looks raw.
- Remove the filling used along with the parchment paper, and bake the crust for an additional 5-8 minutes.
- Fill your pie as desired and finish baking to your recipe specifications.
Notes
- Do NOT chill the dough if you plan on using it the same day. The gluten-free crust can get stiff once chilled, making it harder to roll out without cracking.
- If you are NOT planning on rolling out and shaping this gluten-free shortcrust on the same day, you can chill it in the fridge. Just make sure to let it sit at room temperature for at least an hour before rolling it out.
- Brush the dough with an egg wash before baking it for a beautiful golden crust.
- Add a bit of turbinado sugar on top of the egg wash for a bit of added sweetness and crunch.
- Use a glass baking dish. Seeing the bottom of the pie crust helps ensure you can see that the bottom of your gluten-free pie is nice and golden before removing it from the oven.
- If you're baking a gluten-free pie with a wet base (for example, pumpkin pie or a gluten-free quiche), always blind-bake your pie crust. For added protection against a soggy bottom pie, brush the top of the pie crust with an egg wash or egg white and then pop it back into the oven for 2-3 minutes to set. This will help create a seal between the crust and the filling.
- If the tops or edges of your crust start to get golden and the pie is not done, tent the crust with some foil and continue to bake.


Leave a comment.